FILM 101 — On Making Small Cinemas
An introductory syllabus in assembling short films with the assistance of machine intelligences — from a grain of story to a full moving picture with music.
This is a small course on a small art. By the end of it, you will know how to take a scrap of story from your imagination and turn it into a one-minute film — with consistent characters, cinematic motion between frames, and an original score. You will not need to draw, animate, or compose anything by hand. You will need only your taste, a willingness to iterate, and an afternoon or two.
The tools you will use are Kive (for still frames), Higgsfield Cinema Studio (for video between the frames), Suno (for the music), and your favorite large language model (to do the thinking in between). The method is simple: plan the story as a sequence of clips, generate two frames for each clip, animate between them, score the whole thing, and stitch it together.
The Story Outline
Every film begins as a sentence in your head. Before you touch any tool, answer three questions on paper:
One. How many seconds of footage do you want? A minute is a good starting point. Short enough to finish in an afternoon, long enough to tell a small story.
Two. How long should each clip be? Ten seconds is recommended. It is the sweet spot for the video models we will use — short enough to stay coherent, long enough to contain a moment.
Three. Divide the total length by the clip length. That is the number of clips you need to write.
Once you have the number of clips, write the outline. One sentence per clip. Then list every character and object that appears more than once. These are the things you will need to train in Lesson Three so their appearance stays consistent from frame to frame.
Character Creation, Part One
Open MidJourney and generate a portrait of every recurring character and object from your list. Aim for a clean, full-body or full-object image against a simple background — this will be the seed your frame generator uses to keep the character looking the same in every clip.
Think of this step as casting. You are choosing who plays Greg. Once chosen, Greg must look like Greg in every frame, or the film will feel broken.
Generate several options. Pick the one with the clearest silhouette and the most character. Save it.
Character Creation, Part Two
Now give each character and object a name, and teach them to Kive so they can be summoned in later prompts. Open kive.ai and navigate to AI Models in the left sidebar.
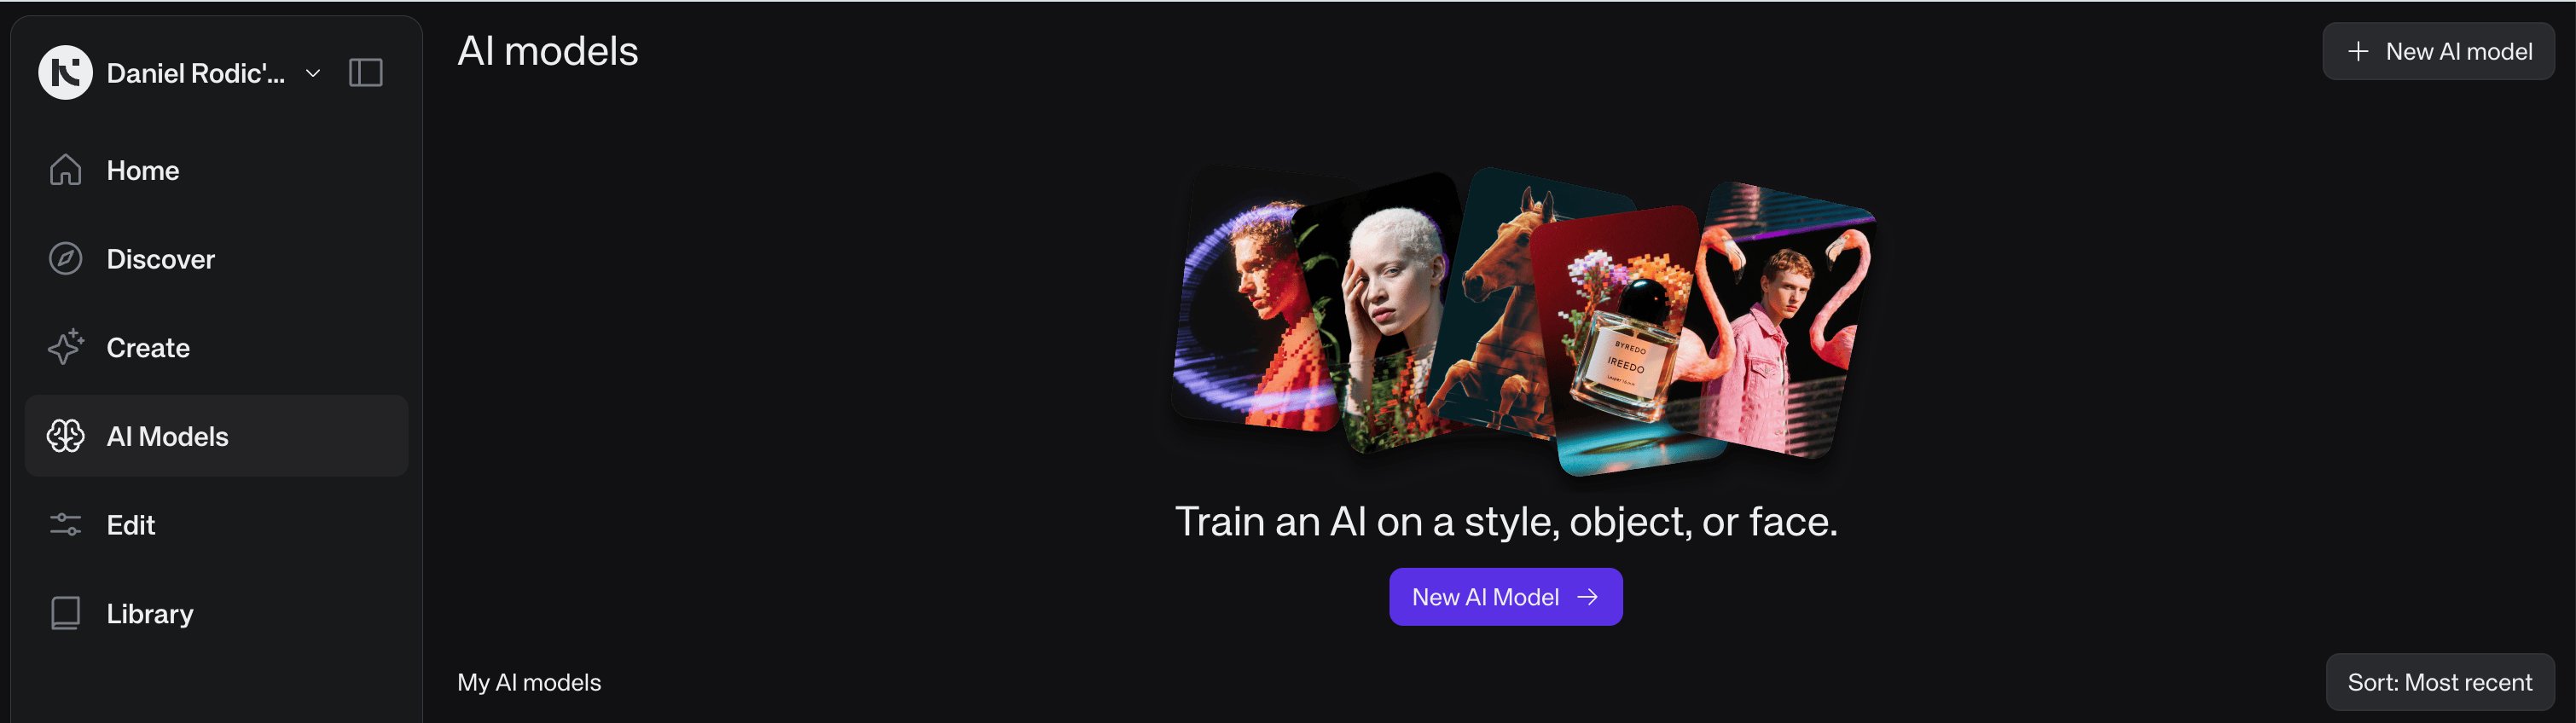
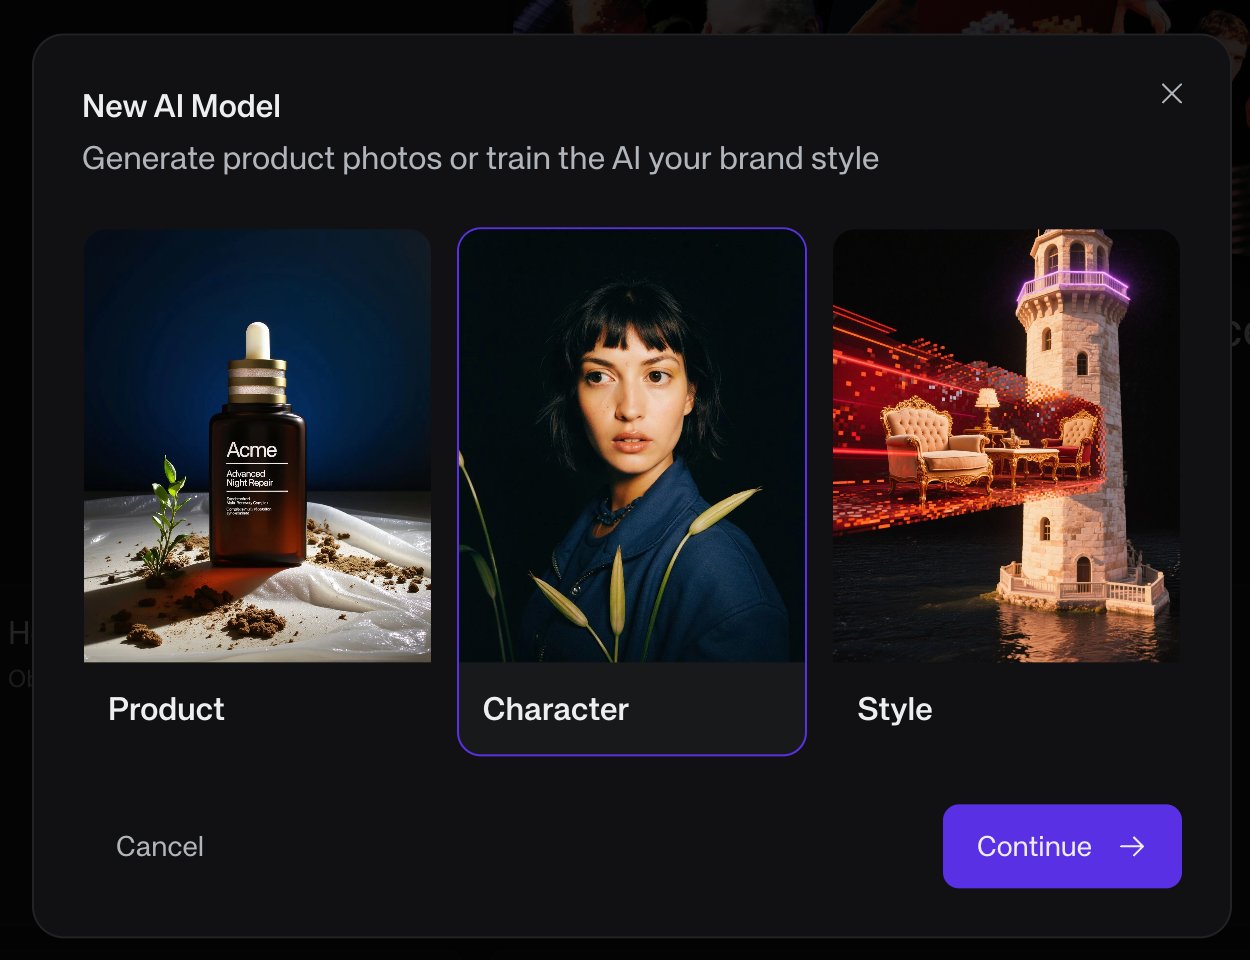
Click New AI Model. Choose the appropriate type: Character for a person or creature, Product for an object, Style for an overall aesthetic.
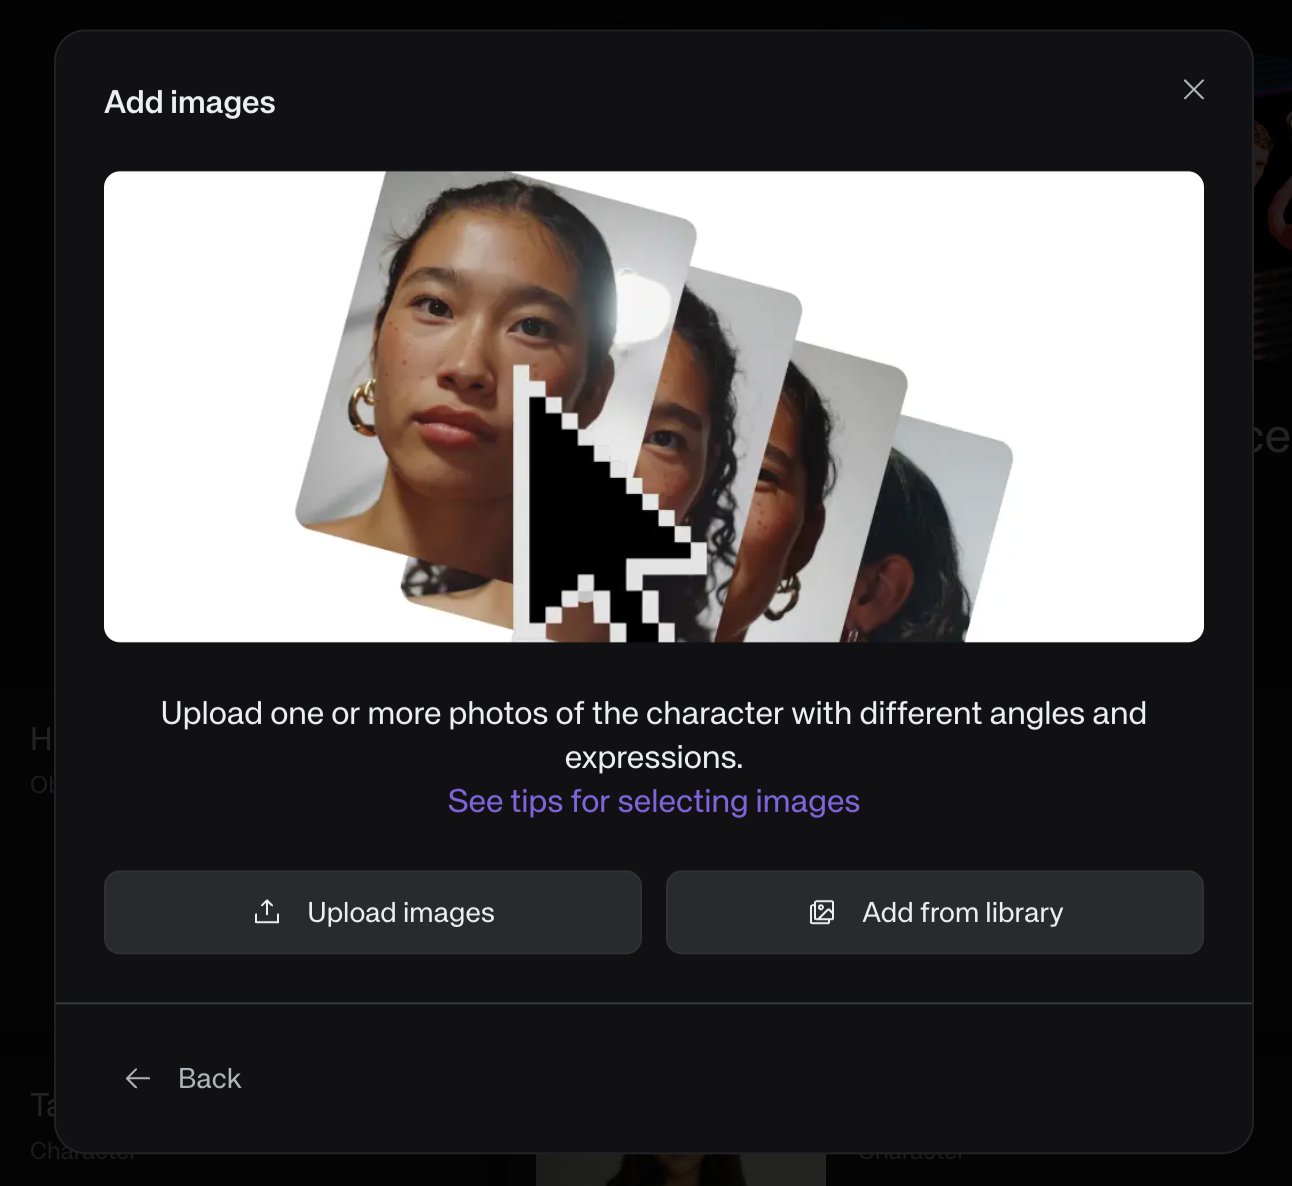
Upload the image (or images) you generated in Lesson Two. If you have multiple angles or expressions of the same character — even better — but a single clean image is often enough.
Finally, name the character. Use a short, memorable name — it is what you will type into prompts later. Greg. Darcy. The Hole.
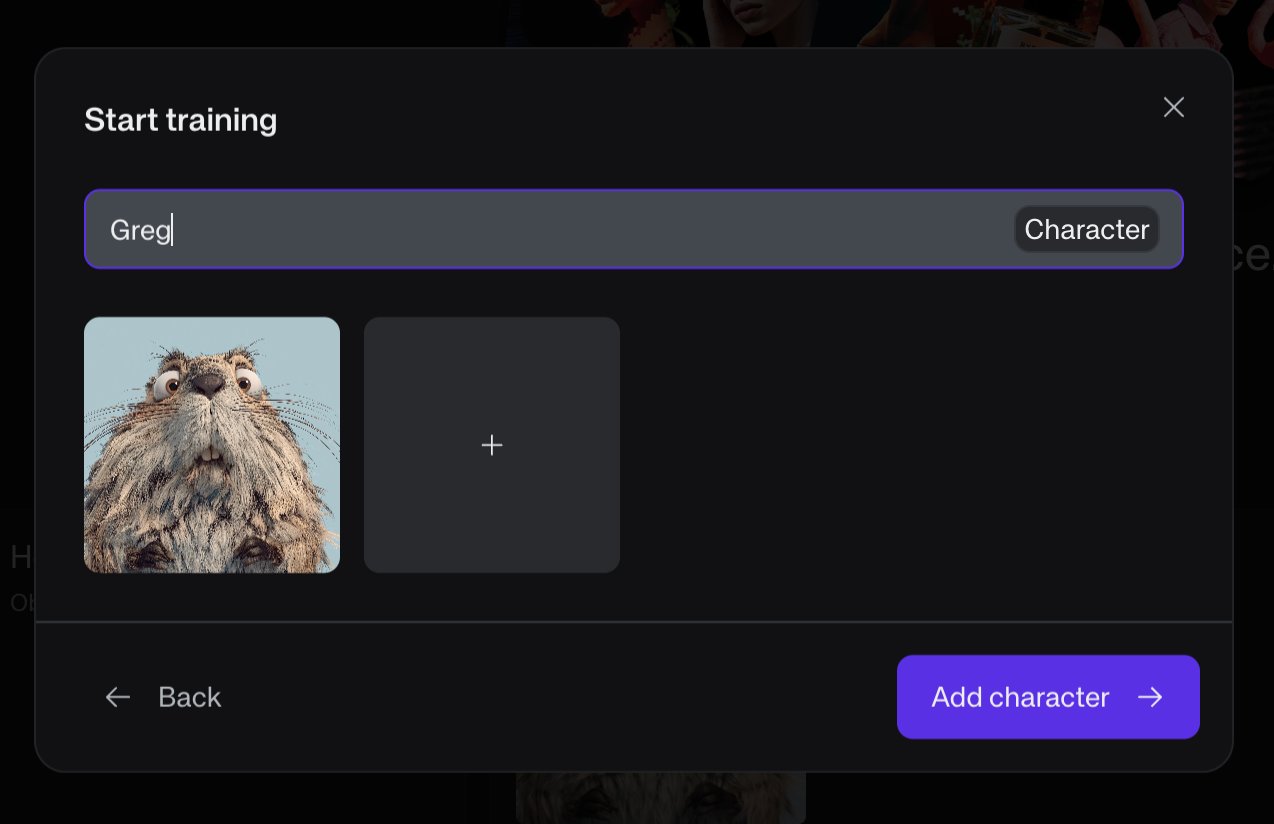
Click Add character and let Kive train. Repeat for every recurring element in your story.
Storyboard, Part One — The Prompts
Return to your preferred large language model — Claude, ChatGPT, or whichever companion you keep. Paste in your story outline from Lesson One along with the names of the characters you trained in Lesson Three. Ask it to generate a start frame and end frame description for each clip.
The LLM should produce static image prompts — no motion, no camera moves, no style descriptors (the trained character already carries the style). Each prompt is a snapshot. The end frame of one clip should visually resemble the start frame of the next, so the cuts feel natural.
Using Claude? Install the companion skill for best results
We have packaged the entire pipeline described in this course into a Claude skill — a small file Claude can load to handle this workflow properly (image prompts without motion, motion prompts with @image references, Suno scoring prompts in the right format).
To install:
- Download the file below.
- Open Claude in your browser at claude.ai.
- Go to Settings → Capabilities → Skills.
- Click Upload skill and select the
.skillfile. - In any new conversation, mention that you are making an AI film — Claude will trigger the skill automatically.
Whether or not you use the skill, here is an example prompt you can paste into your LLM to get started:
Storyboard, Part Two — The Frames
Take the prompts your LLM wrote and paste them into Kive, one clip at a time, in order. For each prompt, you will need to reference the character you trained by typing the @ symbol — a menu will appear with your characters, objects, and styles. Select the right one and it becomes a tag in the prompt.
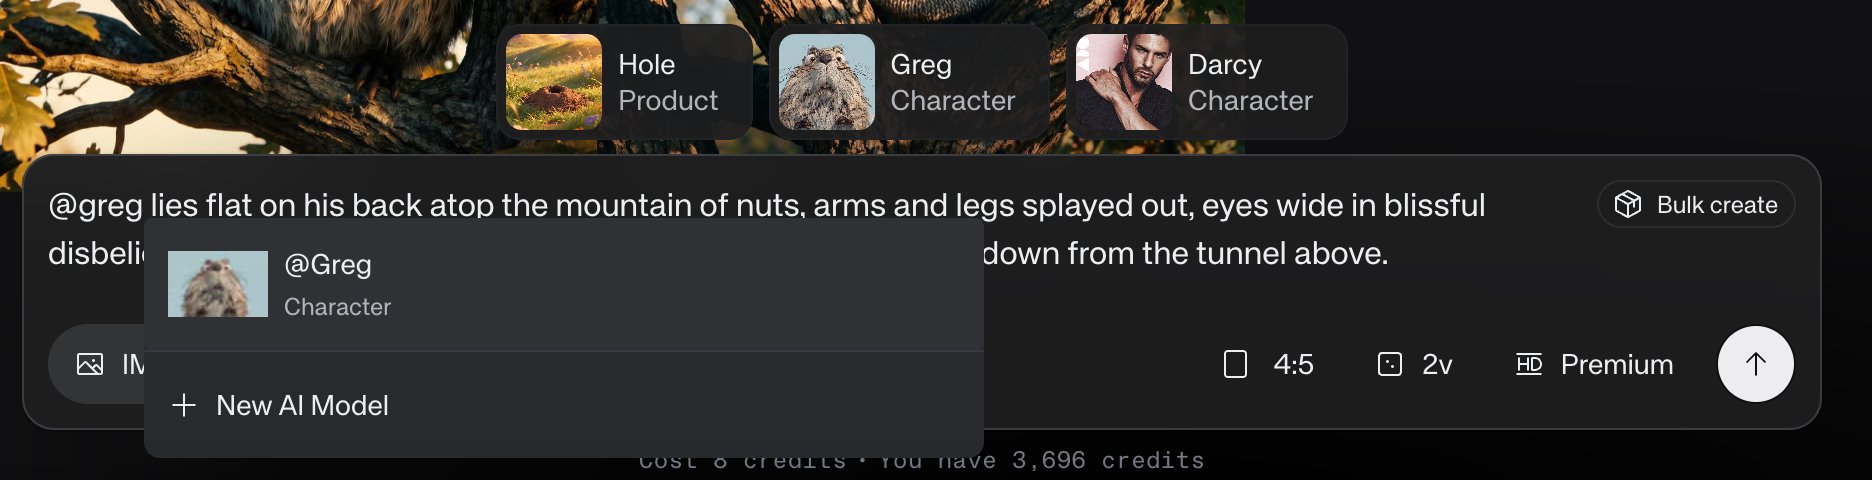
Generate both the start and end frame for each clip. Pick the best generation for each. As you go, download and number each file in order: frame 1 is the start of clip 1, frame 2 is the end of clip 1, frame 3 is the start of clip 2, and so on.
When you are done you will have, for a 60-second film, twelve numbered image files sitting in a folder — ready to drop back into your LLM for the next step.
Video Creation — The Motion Outline
Return to the same LLM conversation you used in Lesson Four. Upload all twelve numbered images. Ask your LLM to produce a Higgsfield / Cinema Studio motion prompt for each clip — one prompt per pair of frames, with the image references embedded inline.
The inline reference is important. Higgsfield needs to know which image is the start and which is the end; it reads @image1, @image2 tags inside the prompt body to figure this out. Your LLM should write sentences like:
Note the use of a generic noun — "the gopher" — rather than the trained character's name. Higgsfield does not know who Greg is; it only knows the two images you are feeding it. Character consistency has already been handled in Lesson Five.
Here is a prompt you can copy and paste into your LLM to do this:
Video Creation — The Clips
Open Higgsfield Cinema Studio 3.5. Upload all twelve numbered images at once — they will appear in your media library.
For each clip, click Add reference media and select the two images in order — start frame first, end frame second. Paste the motion prompt your LLM wrote for that clip. You may need to re-select the @image1 and @image2 references from the upload menu so Higgsfield knows which image is which.
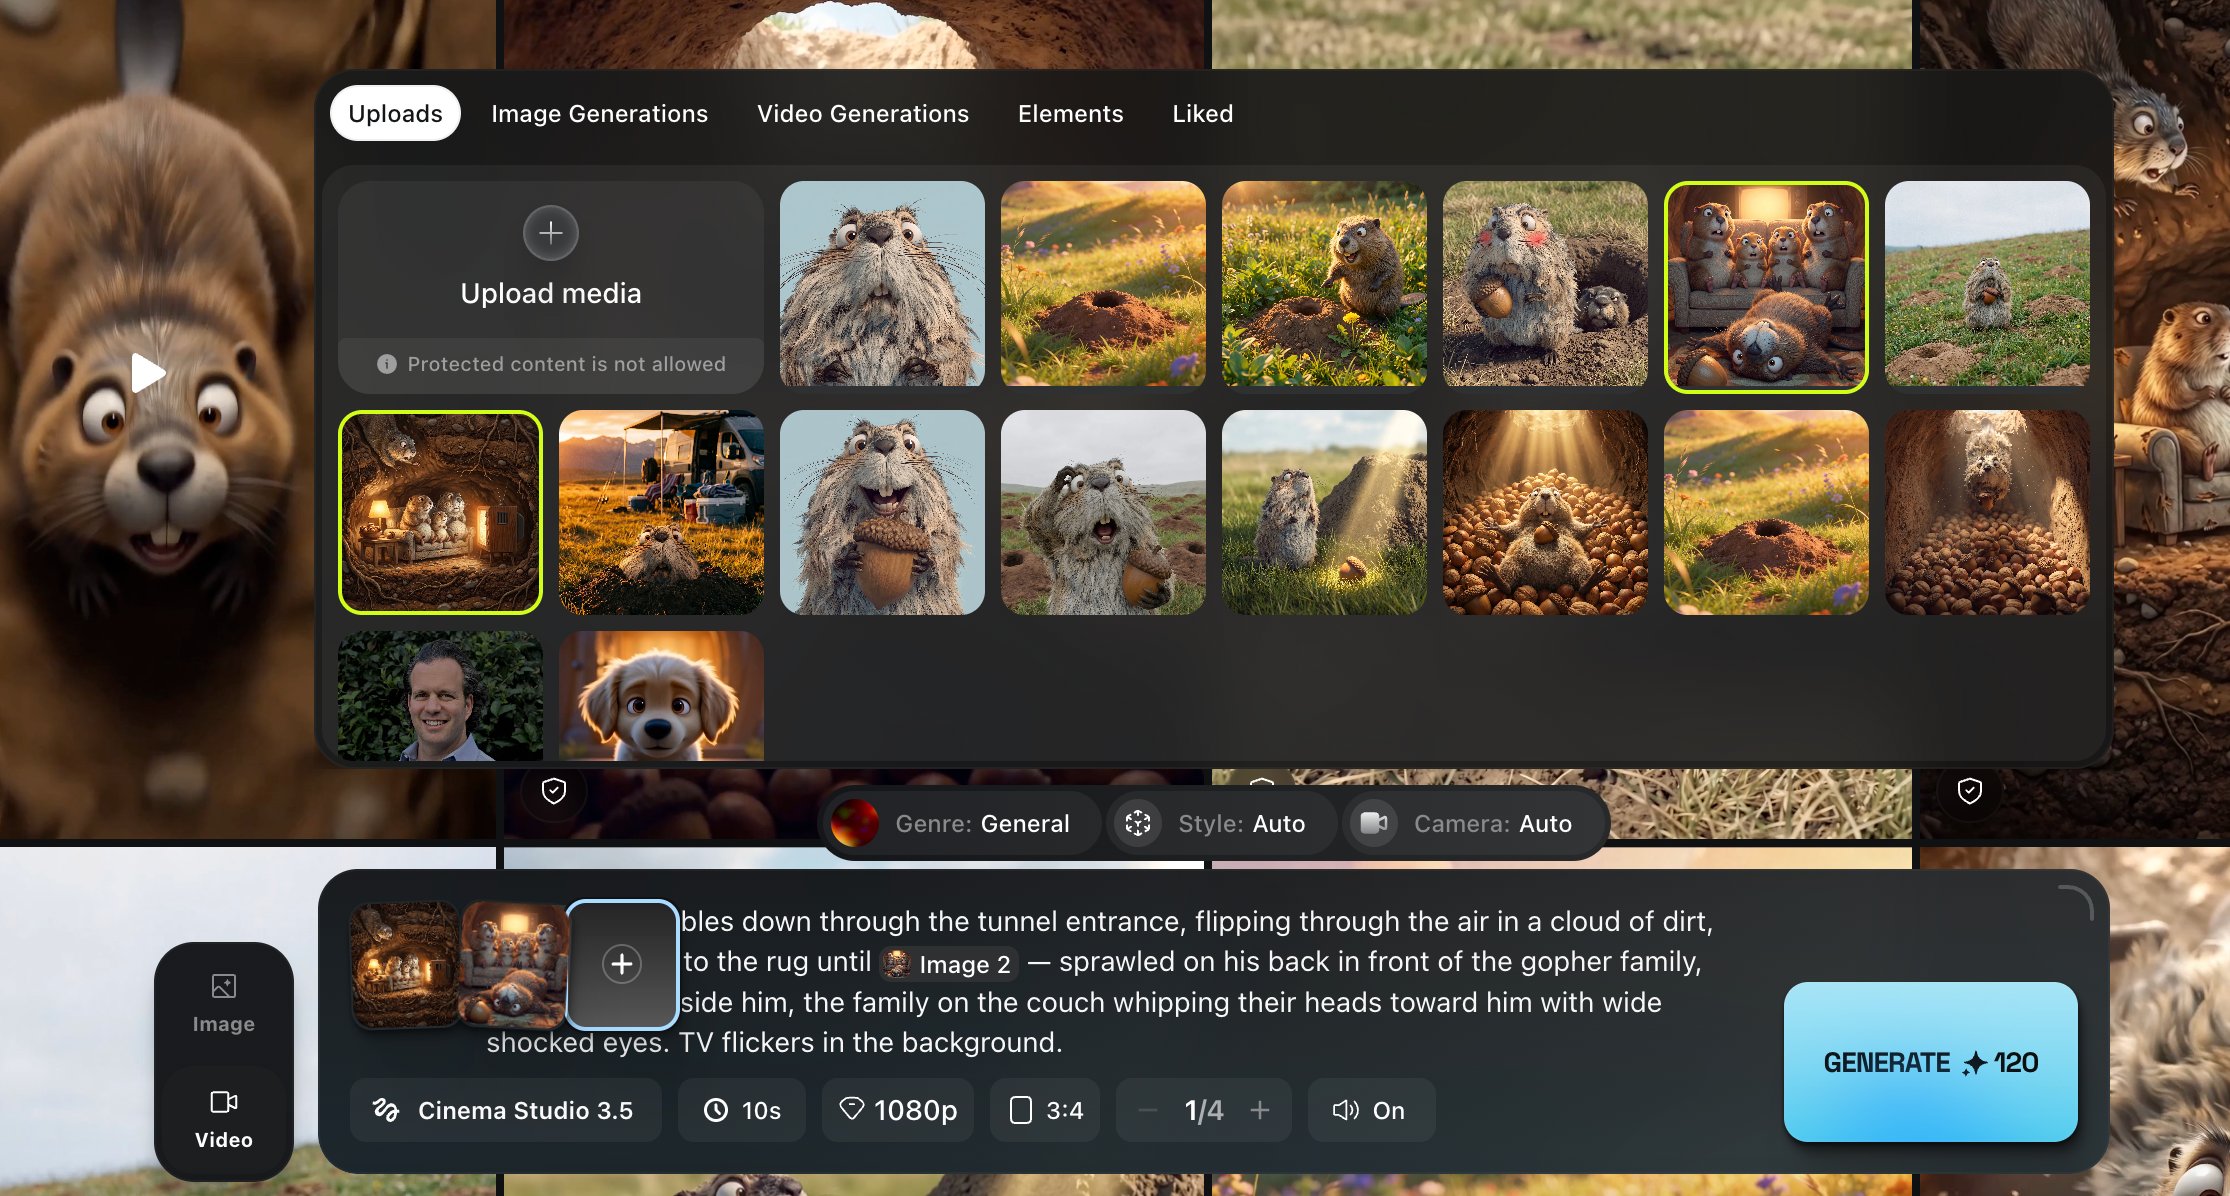
Confirm the settings before generating. These are the ones to check:

1080p resolution, 10-second duration, your preferred aspect ratio, and audio on. Click generate.
Repeat for each clip. Download every generated video. You should end up with six ten-second clips — sixty seconds of footage in total.
Video Creation — The Score
A film without music is a silent film. Silent films are a noble tradition, but this is not one. Open your LLM once more and ask it for a Suno style prompt. Keep it to a style description only — no lyrics, no structure tags beyond what Suno expects.
A good rule: aim for a track twice the length of your film. A 60-second film deserves a roughly 2-minute track, so you have headroom when editing.
Here is a prompt you can paste into your LLM:
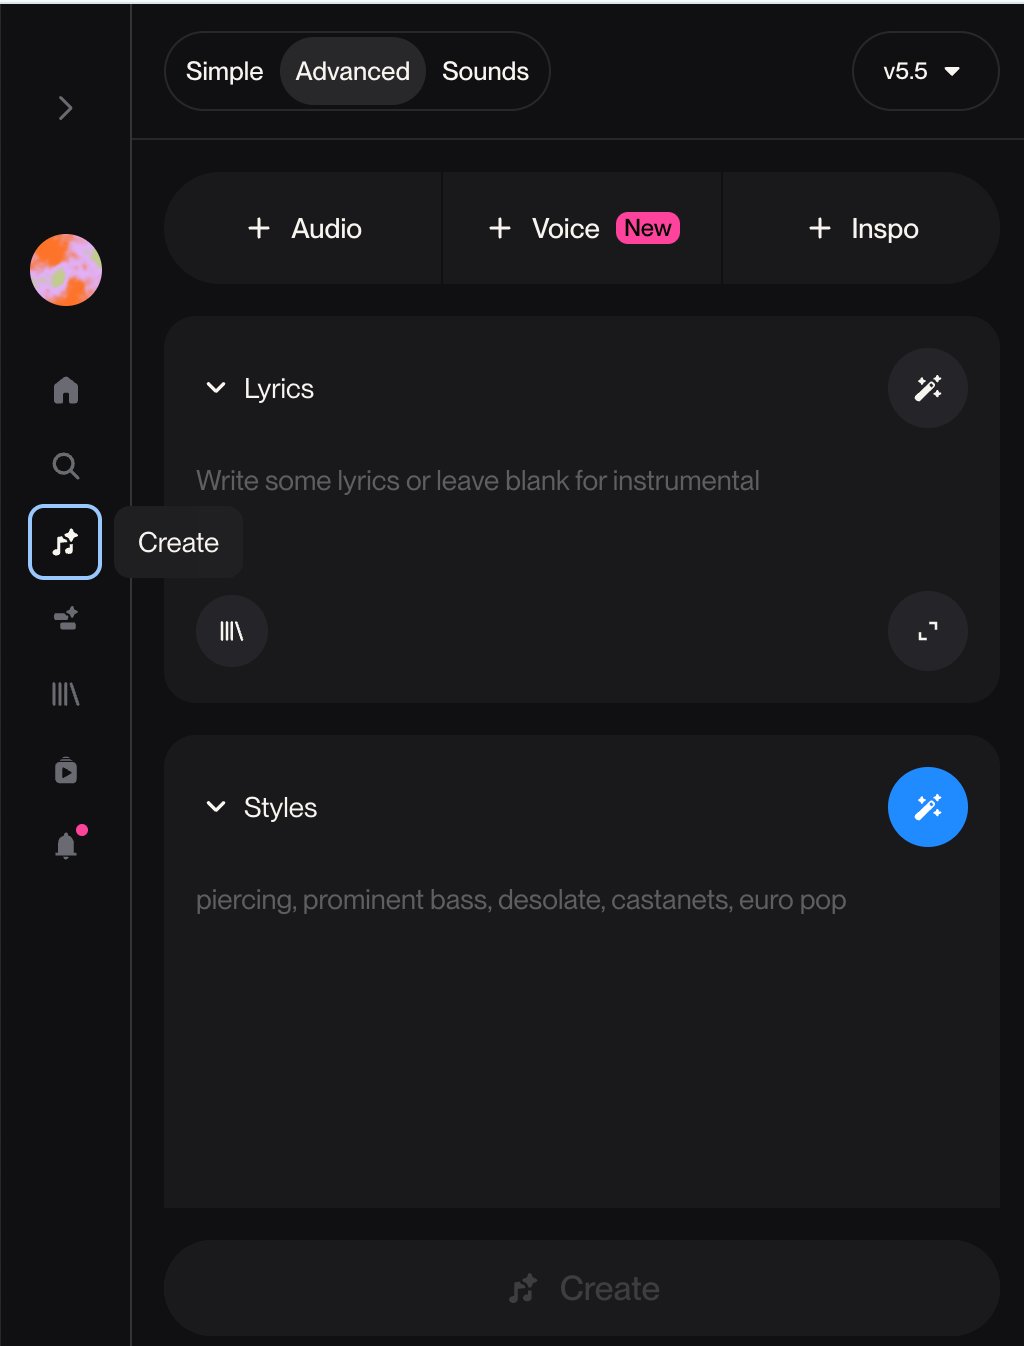
Take the result and paste it into suno.ai. Switch to Advanced mode. In the Lyrics box type [instrumental]. Paste the style text into the Styles box. Click Create.
Generate a few versions. Pick the one whose arc best matches your film.
Video Creation — The Edit
Open your editor of choice — CapCut, Premiere, Final Cut, DaVinci Resolve, iMovie. Any will do. Drop in your six clips in order. Drop in your Suno track beneath them. Trim the music to match the film's length, with a fade at the end.
Watch it through. Then watch it again with fresh eyes. You will notice gaps — a clip that feels too slow, a cut that jars, a moment that does not land. That is normal. Return to the appropriate lesson and re-generate what is not working:
Is the motion wrong? Go back to Lesson Six and rewrite the motion prompt. Re-run in Higgsfield (Lesson Seven).
Is the frame composition wrong? Go back to Lesson Four and rewrite the image prompt. Re-generate in Kive (Lesson Five).
Does the music not fit? Go back to Lesson Eight and generate a new Suno track.
Iterate until it feels finished. Export. Share.
That is all there is to it. Go make something small.